
StatCounter
Friday, July 25, 2014

Tuesday, July 22, 2014
Stove Polish
Our antique wood stove got polished. This is what I used from Amazon
http://www.amazon.com/Rutland-Stove-Grill-Liquid-Polish/dp/B001AWFJTE/ref=sr_1_4?ie=UTF8&qid=1406036241&sr=8-4&keywords=stove+polish
 It took less than a hour and used about 1/3 of the bottle.

 I like how the flat and sheen highlight the castings details

http://www.amazon.com/Rutland-Stove-Grill-Liquid-Polish/dp/B001AWFJTE/ref=sr_1_4?ie=UTF8&qid=1406036241&sr=8-4&keywords=stove+polish
Sunday, July 13, 2014
Tree 2uvr-c quill handle, z clutch


Saturday, June 28, 2014
Honeywell gas valve lasts almost 60 years
Repaired a GE gas furnace that was installed in the 50's. The gas valve wouldn't shut all the way off....
 Honeywell gas valve and replacement on top. This furnace does not have a "safety pilot cut off" and the gas to the pilot is on all the time. The pilot is proven by a bi-metal switch. You can see the switch and pilot in the lower center. The main gas valve is just that with no thermocouple or pilot stuff. Valve does have a pressure regulator.
 Here is the old valve apart. You can see the flapper has not been hitting the seat on center. Sometimes it missed and got hung up on the washer letting some gas through. Sometimes one burner row would stay on a little...
 Here is the flaps attachment to the solenoid, the swage has come loose.
 I can move the flap to the correct position with my finger but it won't stay.
 Swaged connection has been working loose for a while. Time to replace the valve with new.
Friday, June 27, 2014
Making a thumbscrew
The Tree mill was missing a thumbscrew on the table dial lock so I made one.
 Thread is 1/4 -28, most of the ones I found online were 1/4-20. Going to use an allen head fastener and press on a knurled ring. Original thumbscrew from the other side.
 Middle size knurl looks about a match to the original
 Knurled a piece of hot rolled round, then face and drill .005 undersize.
 faced drilled and cut off.
 ready to grind off remains of cut
 Pressing ring on, it was pretty tight
 That knurled ring isn't going to come off
 Ready to use
 Made a wooden toolbox to fit on the ram.
Tuesday, June 10, 2014
Mini Split heatpump install
Installed a mini split heat pump in the garage. Got it from Amazon. Very pleased.
link below.
Pioneer Heat Pump-Dehumidifier
Here is what it looks like unboxed. It came by truck, I picked it up at CEVA's terminal with a Yaris hatchback.
 Comes with r410A precharged in the condensor
 Mount for evaporator. I hung it from the ceiling.
 Condensor wall brackets came with sleeve anchors for brick.
 Drilled a two inch hole through the wall for freon lines and control power to evaporator. The power supply connects to the condensor only. The instructions said to use a three inch hole but I'm not going to run the condensate drain tube through with the freon lines. The tube connectors will fit through two inch.
 A couple more inches to go...never hit rebar and I'm glad.
 Aluminium flashing used for a hole liner for a smooth passage. Supplied tube was too big in diameter and too short.

 Evaporator takes no wall or floor space
 Vacuuming the lines and evaporator. I know the blue and yellow hoses are reversed. It's 410a so no EPA issue yet. These have a 5/16 port you get to buy and adapter for that too. I ran the condensate through the tube that runs along the ground and drains an existing dehumidifier. Fitting are flare, I read to lube the back of the nuts and use a backup wrench when installing. Tube was preflared and looked polished.
 Mini split uses a remote control to tell it what to do, comes with a wall pocket to hold it. The unit is really quiet compared to a window air conditioner.
link below.
Pioneer Heat Pump-Dehumidifier
Here is what it looks like unboxed. It came by truck, I picked it up at CEVA's terminal with a Yaris hatchback.
Roadmaster baseplate to Blue Ox towbar adapters
A while back I made a set of adapters to go the other way for tow bracket adapters. This time I'm making a set to go from a Roadmaster baseplate to a Blue Ox towbar. Made from 1.500 solid key stock they will never bend.
 Silver tabs are Blue Ox, square tabs fit Roadmaster tow brackets and a Blue Ox towbar.
 Test fit in Blue Ox style towbar connector
 Bevel the ends
 Set zero with the table
 Set 45 degrees in relation to the table and spindle

 poor man's surface plate and scribe
 Nexus carbide end mill holder with APTK inserts, these have the correct geometry compared to triangle insert end mills. It will reach down in there! Very pleased with this cutter.
 Deep slots
Wednesday, May 28, 2014
Racoon trap rescreen and repair. Triangle insert end mill


Monday, May 26, 2014
Shriner car clutch repair
Buddy Jim's shriner car clutch failed so we decided to fix it.
 On the lift for diagnosis
 Jim's car uses a lawn tractor 4 speed transmission with a centrifugal clutch
 We dropped the rear end for clearance to work
 easy to get to the clutch now, missing a motor mount bolt too.
 The clutch was pressed together and has come apart, lost press fit because it spun. Think I can weld it back together.
 Plan to fill the hub with water before welding so the bushing will live on. A 35 mm film can lid fit the bore to seal it and hold the water. Sanded off paint where mig spot welds will go. Nothing to loose if it doesn't work.
 Spot welded back together. water boiling. Put strap iron around clutch face to keep weld splatter off of it. Bushing seems to be OK.
 Ready to reinstall. Seems to be fixed
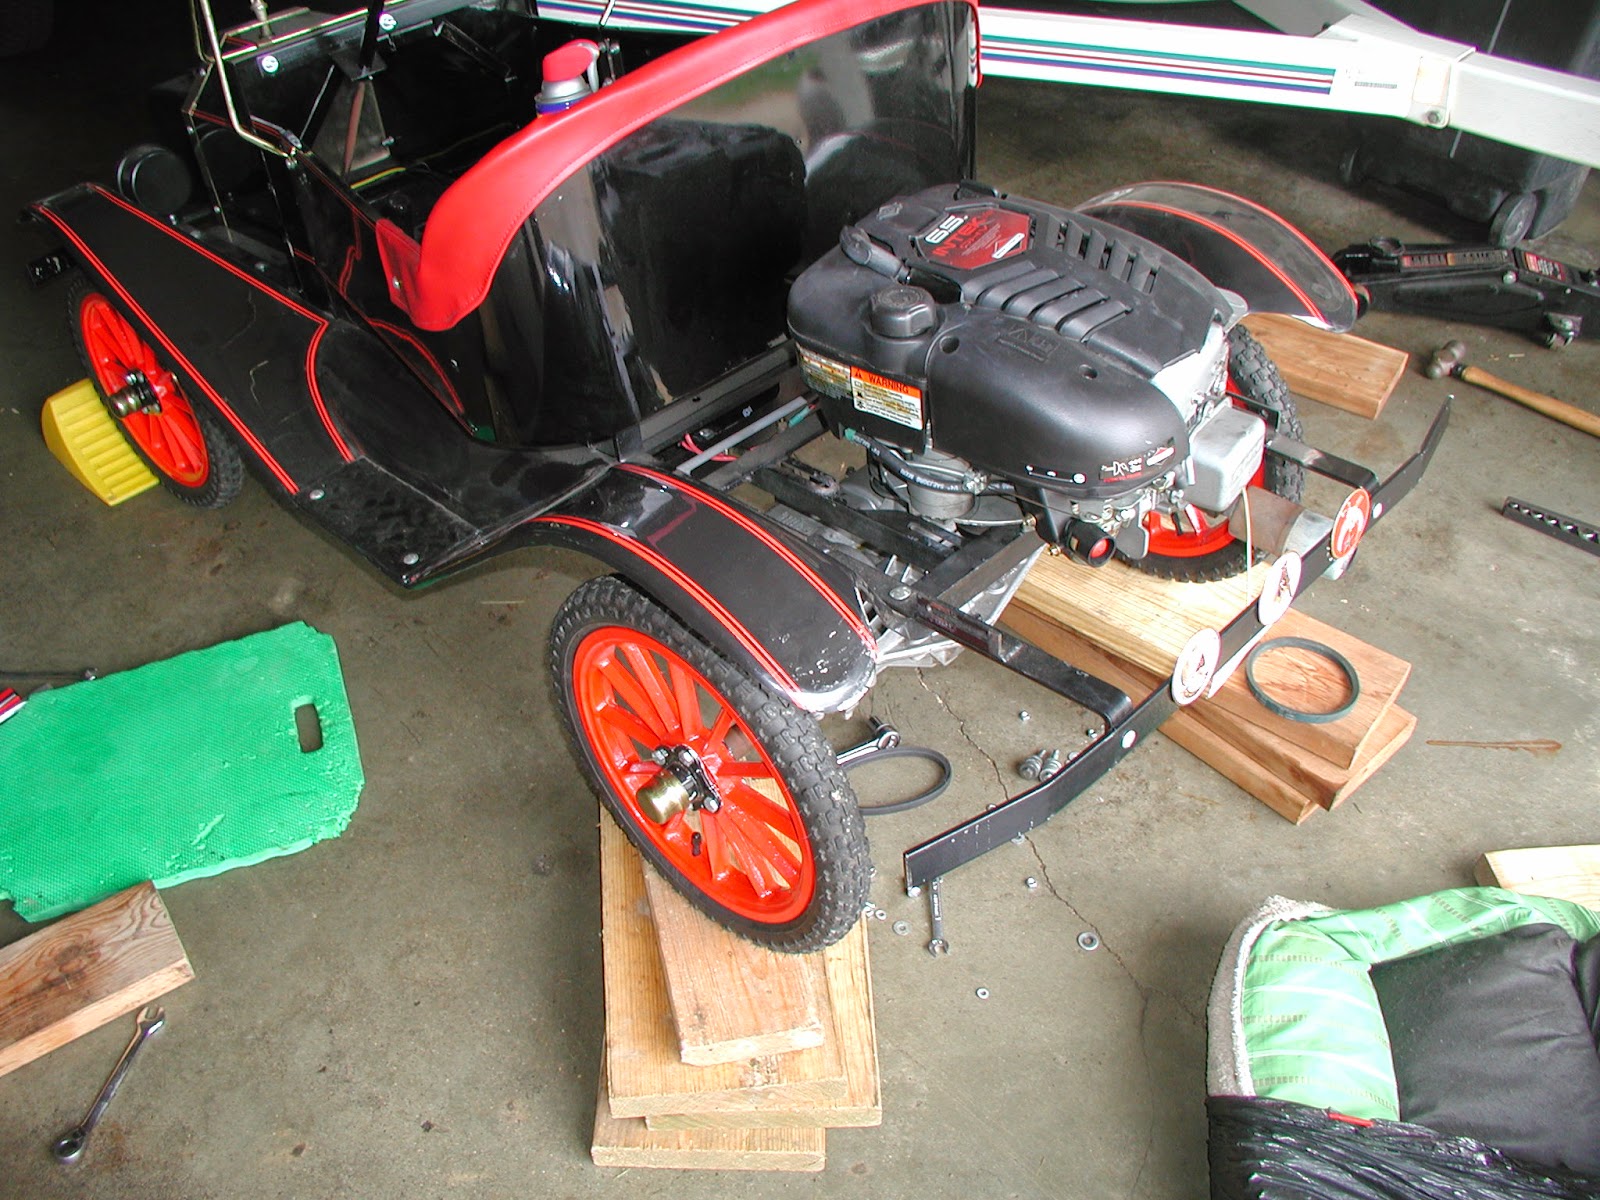 Going back we needed to extend the motor mount slots and replace the missing bolt.

Road test seems OK!
Road test seems OK!
Subscribe to:
Posts (Atom)